How to Make Jeans Fit Better a Practical Guide

That "perfect pair" of jeans—the one that feels like it was made just for you—is so much closer than you think. It's really just a matter of learning a few key techniques, from simple, no-sew tricks for a gapping waistband to more hands-on sewing solutions for the legs and seat. The idea is to move beyond the limitations of standard sizing and tackle those common fit problems yourself.
Your Guide To Achieving The Perfect Jean Fit

We’ve all been there. That feeling of finding a pair of jeans that fits your hips like a dream, only to discover a massive gap at the waistband. Or maybe the length is spot-on, but the thighs are baggy and just… off. Think of this guide as your personal roadmap for turning any pair of almost-perfect jeans into a true custom-fit favorite.
First things first, we need to diagnose exactly what’s not working with your current fit. Figuring out whether you’re dealing with a simple length problem or a more complex issue in the seat or rise is the crucial first step. You can't fix a problem until you know precisely what it is, and our comprehensive jeans fit guide is a great place to start identifying those specific issues.
Matching The Problem To The Solution
Once you know the what, you can choose the how. This is where a lot of people get overwhelmed, but it’s actually much simpler than it seems. The right fix can be anything from a temporary, no-sew hack to a permanent alteration that brings your sewing machine into play.
Here's a quick look at some common culprits:
- Waistband Gap: This is probably the most frequent complaint. It can often be fixed with a small, cleverly placed piece of elastic or by taking in the center back seam for a more permanent solution.
- Baggy Thighs or Legs: Tapering the leg from the inseam is a fantastic way to create a slimmer, more modern silhouette that flatters your shape.
- Too Long: Hemming is the obvious answer, of course. But the real secret to a polished look is knowing how to preserve the original, factory-finished hem.
- Too Tight: Sometimes all you need is a little more room. Gentle stretching methods or adding small, hidden gussets can give you that much-needed comfort without sacrificing style.
A Quick Guide To Jean Alterations
To make it even easier, here’s a quick-reference table to help you match common fit problems with the best solutions, whether you're looking for a quick fix or a more lasting change.
| Fit Problem | Quick Fix (No-Sew) | DIY Sewing Solution | When to See a Pro |
|---|---|---|---|
| Waistband Gap | Use a belt or a waistband pin; "jeans button" trick. | Take in the back seam or add elastic darts inside. | For complex reshaping or if the gap is over 2 inches. |
| Too Long | A temporary cuff or "fashion tape" hem. | Hem the jeans, preserving the original hem if possible. | For delicate fabrics or achieving a very specific break. |
| Too Tight | The "wet stretch" method (wear damp jeans to stretch). | Add a gusset to the waistband or inseam. | When significant fabric needs to be added. |
| Baggy Thighs | Can be difficult to fix without sewing. | Taper the leg from the inseam for a slimmer fit. | For maintaining the outseam and overall leg shape. |
| Baggy Seat | Pinning strategically for a temporary lift. | Add darts to the back yoke or take in the seat seam. | For a complete seat reconstruction. |
This table should give you a solid starting point for whatever denim dilemma you're facing. Remember that even a small adjustment can completely transform how a pair of jeans looks and feels.
Getting Ready To Alter
The desire for a better fit has deep roots. Jeans started as pure workwear back in the 1870s, but after the 1950s, the cultural shift toward personal style put a new emphasis on how they fit. Today, it's estimated that around 60% of consumers alter their jeans after buying them—a huge number that really speaks to our collective desire for a personalized fit.
For those of you ready to dive into DIY adjustments, getting prepped is everything. To really nail that custom silhouette, using one of the many adjustable dress forms for sewing your perfect fit can be a game-changer for getting your alterations just right. After all, having the right tools always makes the job easier.
Fixing a Gaping or Too-Tight Waistband
The waistband is the very foundation of how your jeans fit, but it's often the biggest source of frustration. Nothing ruins the vibe of an otherwise perfect pair of jeans like that dreaded gap at the back. It can make you feel sloppy and uncomfortable. On the flip side, a waistband that’s just a little too snug can make you want to rip them off the second you get home.
But here’s the good news: both of these problems are totally fixable. Whether you're dealing with too much room or not quite enough, a few clever techniques can make all the difference.
Conquering the Waistband Gap
A gap at the back of your jeans is an incredibly common fit issue, especially if your hips are curvier than your waist. The denim pulls taut across your hips but leaves that annoying pocket of empty space right at the small of your back. You are definitely not alone in this.
Sure, a belt is the quickest no-sew fix, but if you want something more permanent and seamless, there are better ways.
- The Elastic Trick: This one is a game-changer. Just make a small, 1-inch slit on the inside layer of your waistband, on either side of the center belt loop. Then, thread a 6-inch piece of sturdy elastic through the channel you've created. Pull it nice and taut to cinch in the gap, and then stitch the elastic down securely on both ends.
- Taking in the Back Seam: For a truly professional-looking result, you can take in the center back seam. This is a bit more involved—you’ll need to remove the center belt loop, carefully unpick the waistband stitching, and create a new, deeper seam. Once you sew it all back up, the waistband will sit perfectly flush against your back.
Pro Tip: Before you commit to a size, pinch out the excess fabric to see how much you need to remove. But here's the key: do it while you're sitting down. This guarantees you'll leave enough room for comfort and movement, so the waist doesn't become too tight when you bend or sit.
If you’re not sure exactly why your jeans are gapping, figuring that out is the first step. You can find some great advice for diagnosing the cause of a jeans gap in the back to help you pick the right solution.
Creating More Room in a Tight Waistband
A tight waistband is just as maddening as a gaping one. We’ve all been there—a pair of jeans fits like a dream everywhere else, but the waist digs in so uncomfortably. Don't toss them! You can absolutely create a little extra breathing room.
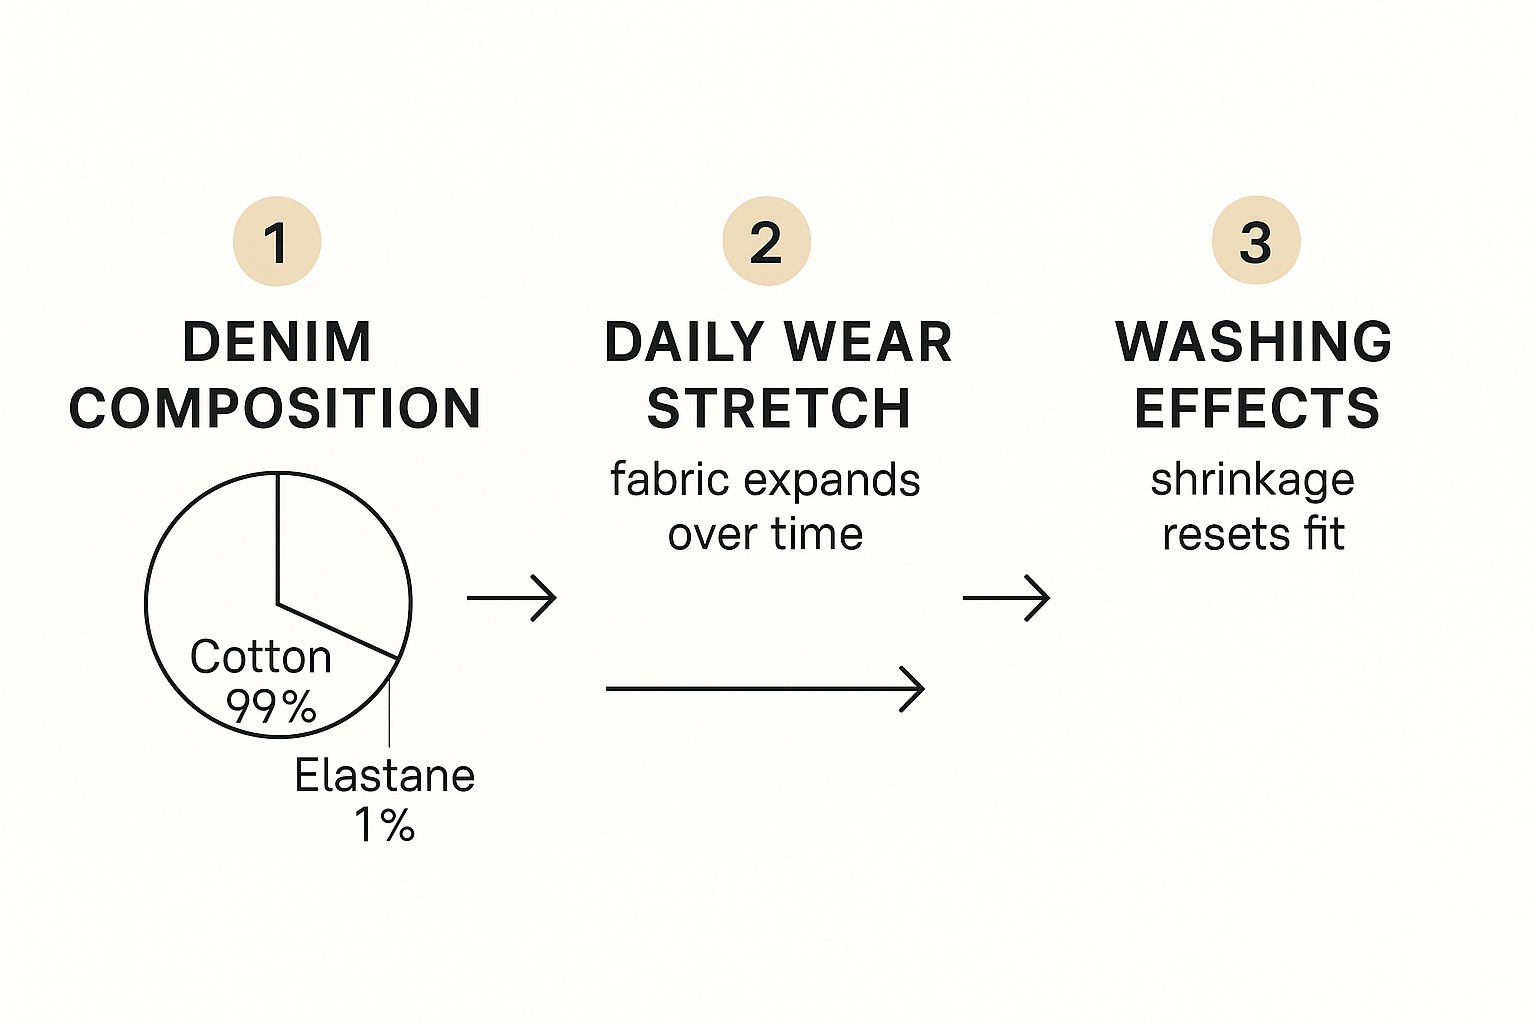
This infographic shows just how much the denim's composition and your daily habits can change the fit over time.

As you can see, that blend of cotton and stretch fibers, plus how you wear and wash your jeans, really dictates how they loosen and tighten.
A great first attempt is the "wet stretch" method. All you do is spritz the waistband with lukewarm water until it's damp, then pull on the jeans. Wear them around your house for about 30 minutes, doing plenty of bending and moving to gently coax those cotton fibers into stretching. As they dry on your body, they'll mold to your shape with a bit more give.
For a more significant stretch that lasts, a waistband stretcher tool is your best friend. It applies gentle, consistent pressure while the denim dries, giving you that permanent extra inch or two.
Tapering Jeans For A Slimmer Leg Silhouette

Sometimes a pair of jeans fits perfectly through the waist and hips, but the legs feel just… off. A little too wide, a touch outdated. Tapering is your secret weapon for transforming that bulky silhouette into something modern and streamlined, creating a fit that feels completely custom to you. It’s all about thoughtfully removing excess fabric from the thigh down to the ankle for a much cleaner line.
The real art of a good taper lies in getting the new seam line just right. It’s tempting to just lay the jeans flat and draw a new line, but that rarely works with the reality of a human body. Instead, the best approach is to try the jeans on inside out. This lets you see the original seams and pinch the extra fabric exactly where it needs to come in.
Start at the upper thigh and work your way down, using pins to map out a new, snugger inseam. I like to place the pins vertically along the line I intend to sew. As you go, make sure the fit is comfortable and not overly tight—especially around your calf and ankle. You want a slim fit, not a tourniquet.
Creating The New Seam
Once you have your jeans pinned to perfection, carefully take them off. Now, grab a fabric marker or some tailor’s chalk and draw a smooth, continuous line that connects all your pins. This line is your guide, your path to a better fit. For a truly professional result, stick to altering only the inseam. Messing with the outseam can throw off the entire structure of the jeans and make the pockets look distorted.
A sewing machine is your best friend here, but it needs to be equipped with a denim needle and some heavy-duty thread. Denim is tough, and a standard needle will almost certainly snap.
- Choose the Right Thread: Find a color that’s a close match to the existing stitching. That classic gold or copper-colored thread is usually a safe bet for most blue jeans.
- Stitch with Care: Sew directly along your chalk line, remembering to backstitch at the start and finish to lock everything in place. The goal is to have your new stitch line blend invisibly into the original stitching somewhere around the mid-thigh.
After sewing, try the jeans on again (right side out this time!) to admire your work. If you love the new fit, you can go ahead and trim the excess fabric, leaving about a half-inch from your new seam. Finish that raw edge with a zigzag or overlock stitch to keep it from fraying over time.
A word of caution: it's easy to get carried away and over-taper. You still need enough room to bend your knees and, crucially, get the jeans on and off. Before you make that final, irreversible cut, double-check that you can still slide your foot through the newly narrowed ankle opening.
A No-Sew Alternative For Tapering
Not quite ready to commit to sewing? Or maybe you just want to test-drive a slimmer look first. There's a brilliant temporary fix. A little hemming tape or heavy-duty fabric tape can create a surprisingly effective no-sew taper.
Follow the same process of pinning the jeans while they're inside out. Then, remove the pins one by one, replacing them with a strip of double-sided fabric tape along your marked line. Press down firmly to make sure it sticks. While this method won't hold up to repeated washes like a sewn seam, it’s a fantastic way to experiment and see if you truly love the new shape. It gives you all the confidence you need before bringing out the needle and thread.
How to Hem Jeans and Keep the Original Hem
There's nothing more heartbreaking than getting a new pair of jeans, only to have the tailor chop off the bottom and stitch a flimsy, lifeless new hem in its place. That original, factory-finished edge—with its characteristic roping and slight wear—is part of the denim's soul. Losing it can make even the most expensive jeans look instantly cheap.
But what if I told you there's a technique the pros use that lets you shorten your jeans while keeping that beautiful original hem completely intact? It’s a game-changer, and it's surprisingly simple to do yourself.
The Secret to a Professional Hem
The magic here isn't about re-creating the hem; it's about preserving it. Instead of cutting it off, you'll create a clever, invisible tuck on the inside of the leg. This hides the extra fabric while leaving the original stitched edge right where it belongs. It’s a bit of sewing sleight of hand that gives you a perfect custom length without sacrificing an ounce of character.
Here’s how the idea works:
First, put on the jeans with the shoes you’ll wear them with most. Stand in front of a full-length mirror and fold the hem up until they hit the perfect spot. Pin the cuff securely all the way around, making sure it’s perfectly even.
Now, take them off and lay them flat. Your new stitch line will be just above the original thick hem, on the part of the fabric you've folded up. You’re essentially sewing the bottom of the original hem directly onto the jean leg, creating that hidden tuck.
Grab your sewing machine. A denim needle and thread that matches your jeans are non-negotiable here. Stitch as close as you possibly can to the bottom ridge of the original hem.
A little pro tip: A zipper foot is your best friend for this job. It lets you get the needle right up against that thick, rolled edge for a truly seamless finish.
Once you’ve stitched all the way around, you can trim the excess fabric inside the leg—leave about half an inch. To keep it from unraveling in the wash, run a quick zigzag stitch along that new raw edge.
All that's left is to flip the hem down, give it a good, hot press with an iron, and you're done. What you're left with is a perfectly shortened pair of jeans that look like they were never even touched.
Simpler No-Sew Alternatives
Of course, not every situation calls for a needle and thread. Sometimes a more laid-back approach just feels right.
- The Timeless Cuff: You can never go wrong with a simple cuff. A small, neat roll lends a classic touch to slim or straight-leg jeans. For wider-leg or boyfriend styles, try a bigger, bolder cuff to make more of a statement. It’s a zero-commitment way to play with length.
- The Raw Edge: For an effortlessly cool, slightly undone vibe, a raw hem is perfect. Just take a pair of sharp scissors, cut your jeans to the length you want, and toss them in the wash. They'll fray naturally over time. If you’re impatient, you can pull at the threads a bit to speed things along. This look is especially great for casual, non-stretch denim.
Deciding Between DIY and Professional Tailoring

Knowing your own limits is the real secret to getting your jeans to fit perfectly. While there’s a certain satisfaction in rolling up your sleeves and tackling a project yourself, some alterations are just better left to a seasoned professional. Making the right call from the start will save you from a potential denim disaster and ensure you get that flawless fit you're really after.
For many of us, the DIY route is perfect for simple, low-risk tweaks. If you're just getting comfortable with a sewing machine, these are fantastic projects to build your confidence without putting a beloved pair of jeans on the line.
Good Alterations For DIY Beginners
- Basic Hemming: Shortening your jeans with a simple cuff or a raw, frayed edge is about as straightforward as it gets. Even learning to preserve the original hem is a very achievable DIY skill with a bit of practice.
- Minor Waist Adjustments: That little bit of gaping at the back of the waistband? Fixing a gap under 1.5 inches with the hidden elastic trick or adding a couple of simple darts is a great at-home fix.
- Simple Tapering: Taking in the leg by a small amount along the inseam is a totally manageable task, especially if you’re patient with your pinning and measuring.
These tasks don’t require a ton of special equipment and have a high success rate, even for sewing novices. But the game changes when the adjustments become more structural or you’re working with expensive denim. The last thing you want is to experiment on a pair of high-end selvedge jeans or a rare vintage find. Of course, starting with the right pair is half the battle, and knowing how to choose the right jeans for your body can minimize the need for major surgery in the first place.
When To Call A Professional Tailor
Sometimes, the risk of a DIY mistake is just too high. A professional tailor has the heavy-duty machines, an intimate understanding of how denim behaves, and the skill to handle complex jobs that could easily go wrong at home.
You should always seek out a pro for these kinds of jobs:
- Major Resizing: If you need to take in the waist by more than 2 inches, it’s not a simple fix. It often requires deconstructing and rebuilding the entire seat and yoke of the jeans.
- Complex Seam Work: Altering the outseam, changing the rise, or making big adjustments to the seat are intricate jobs that really do require an expert hand.
- Expensive or Delicate Denim: Just don't practice on your favorite pair of premium or selvedge jeans. A good tailor will know exactly how to work with the fabric without damaging it.
- Adding Panels or Gussets: If you need to add fabric to make jeans bigger, a tailor can do it so seamlessly you’ll never know it was done, often sourcing matching denim for a nearly invisible finish.
A good rule of thumb is this: if the alteration involves cutting into a main structural seam (like the rise or the outseam) or requires more than a simple straight stitch, it's time to find a good tailor. The cost is a smart investment in protecting your clothes and guaranteeing a perfect result.
Frequently Asked Questions About Jean Alterations
Dipping your toes into the world of jean alterations can definitely bring up a few questions. I get it. You're wondering just how much a pair of jeans can really change, or if that quick fix you saw online will actually last. It’s smart to get some clarity before you start pinning, snipping, or stretching.
So, let's talk through some of the most common curiosities I hear. My goal is to help you get that perfect fit with total confidence.
One of the first things people ask is whether shrinking or stretching denim is a permanent solution. The honest answer? Not really. A hot wash might temporarily tighten up your 100% cotton jeans, and a good "wet stretch" session can certainly add some give, but these are almost always temporary fixes. Denim with elastane has memory; it’s literally designed to stretch out and snap back.
A fabric's behavior is rooted in its DNA. A high-cotton pair will mold and change with you over time, but denim with a 2-3% elastane blend will always try to return to its original shape after a wash. Think of stretching or shrinking as more of a short-term trick than a long-term alteration.
For changes that truly stick, nothing beats a structural alteration done with a needle and thread.
How Much Can I Realistically Alter Jeans?
A good rule of thumb I always share with clients is that you can comfortably alter jeans by about one full size—that’s roughly 1-2 inches—without completely distorting their original shape. This goes for taking in the waist, the seat, or tapering the legs.
Once you push past that, you risk throwing everything off balance. The pocket placement looks wonky, the rise feels strange, and the whole silhouette just seems... off. Trying to take a size 34 waist down to a size 30, for example, is less of an alteration and more of a major reconstruction project.
Here’s a practical breakdown:
- Waist: You can usually take it in up to 2 inches before the back pockets start looking weirdly close together.
- Legs: Tapering is pretty flexible, but turning a wide-leg into a skinny-fit is an art. It takes a skilled hand to keep the seam line looking natural.
- Length: Hemming is basically limitless. It's the one alteration where you can remove a significant amount of fabric without any real issues.
Ultimately, the best strategy is to start with a pair that's already close to your ideal size. If you need a little help with that crucial first step, our guide on how to find jeans that fit from the get-go can save you a ton of alteration headaches down the road.
Caring For Your Newly Altered Jeans
After you've put in the effort (or the money) to get that perfect fit, you want it to last. Proper care is everything for maintaining the integrity of both the denim and the alterations.
The golden rule is to wash your jeans as little as possible. When you do, always turn them inside out. This protects the color and any of that beautiful custom stitching.
Use cold water and a gentle cycle to prevent unwanted shrinkage or putting stress on your new seams. Most importantly—and I can't say this enough—avoid the dryer at all costs. The high heat is the number one enemy of a good fit. It shrinks cotton fibers and absolutely destroys elastane, causing your jeans to lose that carefully crafted shape you worked so hard for. Just hang them to air dry. It’s the best way to get the longest-lasting results.
At JAG Jeans, we design our denim with a perfect, comfortable fit in mind from the very beginning. Explore our collection of timeless styles engineered with premium stretch fabrics and no-gap waistbands, crafted to feel like your favorite pair, right out of the box. Discover your perfect fit at JAG Jeans.
Recent Blogs
How to Make Jeans Fit Better a Practical Guide
Tired of ill-fitting denim? Learn how to make jeans fit...
How to Make Jeans Fit Better a Practical Guide
Tired of ill-fitting denim? Learn how to make jeans fit...
How to Make Jeans Fit Better a Practical Guide
Tired of ill-fitting denim? Learn how to make jeans fit...